Bakery Style Chocolate Chip Cookies
Bakery-Style Chocolate Chip Cookies
Scroll to find recipe and step by step instructions.
Servings Size:
makes approximately 12-14 cookies
Measurements:
1 cup of unsalted butter (browned butter should measure out to 3/4 cup)
2/3 cup of packed brown sugar (light or dark)
1/3 cup white granulated sugar
1 large egg
2 tsp of vanilla extract
1 tbsp molasses (optional but highly recommended)
2 cup of All-purpose flour
1 tsp baking soda
1 bar of chocolate (chopped) + 1/3 cup chocolate chips (or you can just use 1 1/4 cup chocolate chips)
How do you make browned butter?
First of all, what is browned butter? It is simply just butter heated over a stovetop in a saucepan until the milk-solids separate. It leaves for a very nutty and caramel flavor to your cookies, which is why a lot of bakery’s use this!
To make it, all you have to do is put your butter in a saucepan over medium-low heat and don’t mix. Every minute or two, swirl the pan a couple times to allow parts of the butter to not burn at the bottom of the pan. After about 5-8 minutes (depending on the temperature you used) the butter should turn a golden brown and you’re going to pour it in a glass bowl or paper bowl. (I recommend pulling the butter off the heat earlier than you think you should because you DO NOT want to burn the butter)
What is the purpose of molasses?
The key difference between brown sugar and granulated/white sugar is molasses. Molasses is the ingredient that is mixed into granulated sugar to create white sugar. Brown sugar is gives your desserts a nutty and caramel flavor. Therefore, adding extra molasses will enhance the nutty and caramel flavor without having to add more sugar or without having to originally use brown sugar.
Why measure in grams?
If you ask any bakery how they measure, most will say they measure in grams. Measuring by weight is more reliable for desserts because some recipes don’t specify if you should pack your ingredients and do not take into account how different people measure their ingredients. A common mistake people make in measuring ingredients is when measuring brown sugar. Brown sugar is clumpier than normal sugar because it is mixed with molasses. 100 grams of white sugar is equivalent to 100 grams of packed brown sugar—though most people don’t pack their brown sugar the same way, so you will most likely not get the same measurement unless using a scale.
Food scales are such an amazing and cheap investment to make for your kitchen because they will allow you to copy recipes perfectly because they are far more reliable and allow you to not use as many dishes! Click here to order a food scale!
Measurements In Grams:
225 grams of unsalted butter
130 cup of packed brown sugar (light or dark)
100 cup white granulated sugar
1 large egg (60 grams)
4 grams of vanilla extract
20 grams molasses (optional but highly recommended)
240 grams of All-purpose flour
1 tsp baking soda
200 grams chocolate
Step 1
Preheat oven to convection 350 degrees fahrenheit.
Beat room temperature butter in stand mixer/by hand for 3-5 minutes (or until butter turns off-white). If you made brown butter, skip this step. (Make sure brown butter is cooled)
Step 2
Add in brown sugar and white sugar.
Beat the sugar with the butter until the mixture is fluffy (about 2 minutes). If you used brown butter, it should whip up and become fluffy as well (if it doesn’t, make sure your butter is cooled).
Step 3
Add your large egg and stir into mixture.
Mix in vanilla and molasses (optional).
Step 4
Add flour, baking soda, and salt to form your dough. If using a stand mixer, mix on low. If mixing by hand, use a spatula.
Step 5
Chop your chocolate bar (I used semi-sweet, or just use semi-sweet chocolate chips).
Add chocolate and mix well to distribute it evenly into your dough.
Step 6
Chill dough for 30 minutes (or even up to 48 hours), to let the ingredients settle together and create the best tasting cookie! You can even freeze the dough, up to 2 months, to have pre-made dough for whenever you want a cookie!
Step 7
Use a 1/3 cup scoop (or however much your heart desires) and place a single ball of dough on baking tray. THIS IS YOUR TEST COOKIE! Always start with baking a single cookie, to make sure you didn’t forget an ingredient and/or your oven isn’t too hot (some ovens have hot-spots or cook things quicker/slower than others). This is also a good indicator of how much your cookie will spread.
Step 8
After baking your test cookie, place cookie dough balls on your tray. Use your test cookie to estimate how many cookies you can fit on your tray.
Bake cookies for 12-13 minutes (for 1/3 cup scoop), or until edges are slightly golden. You want to partially under-bake the dough, to get the crispy outside and gooey inside
Step 9
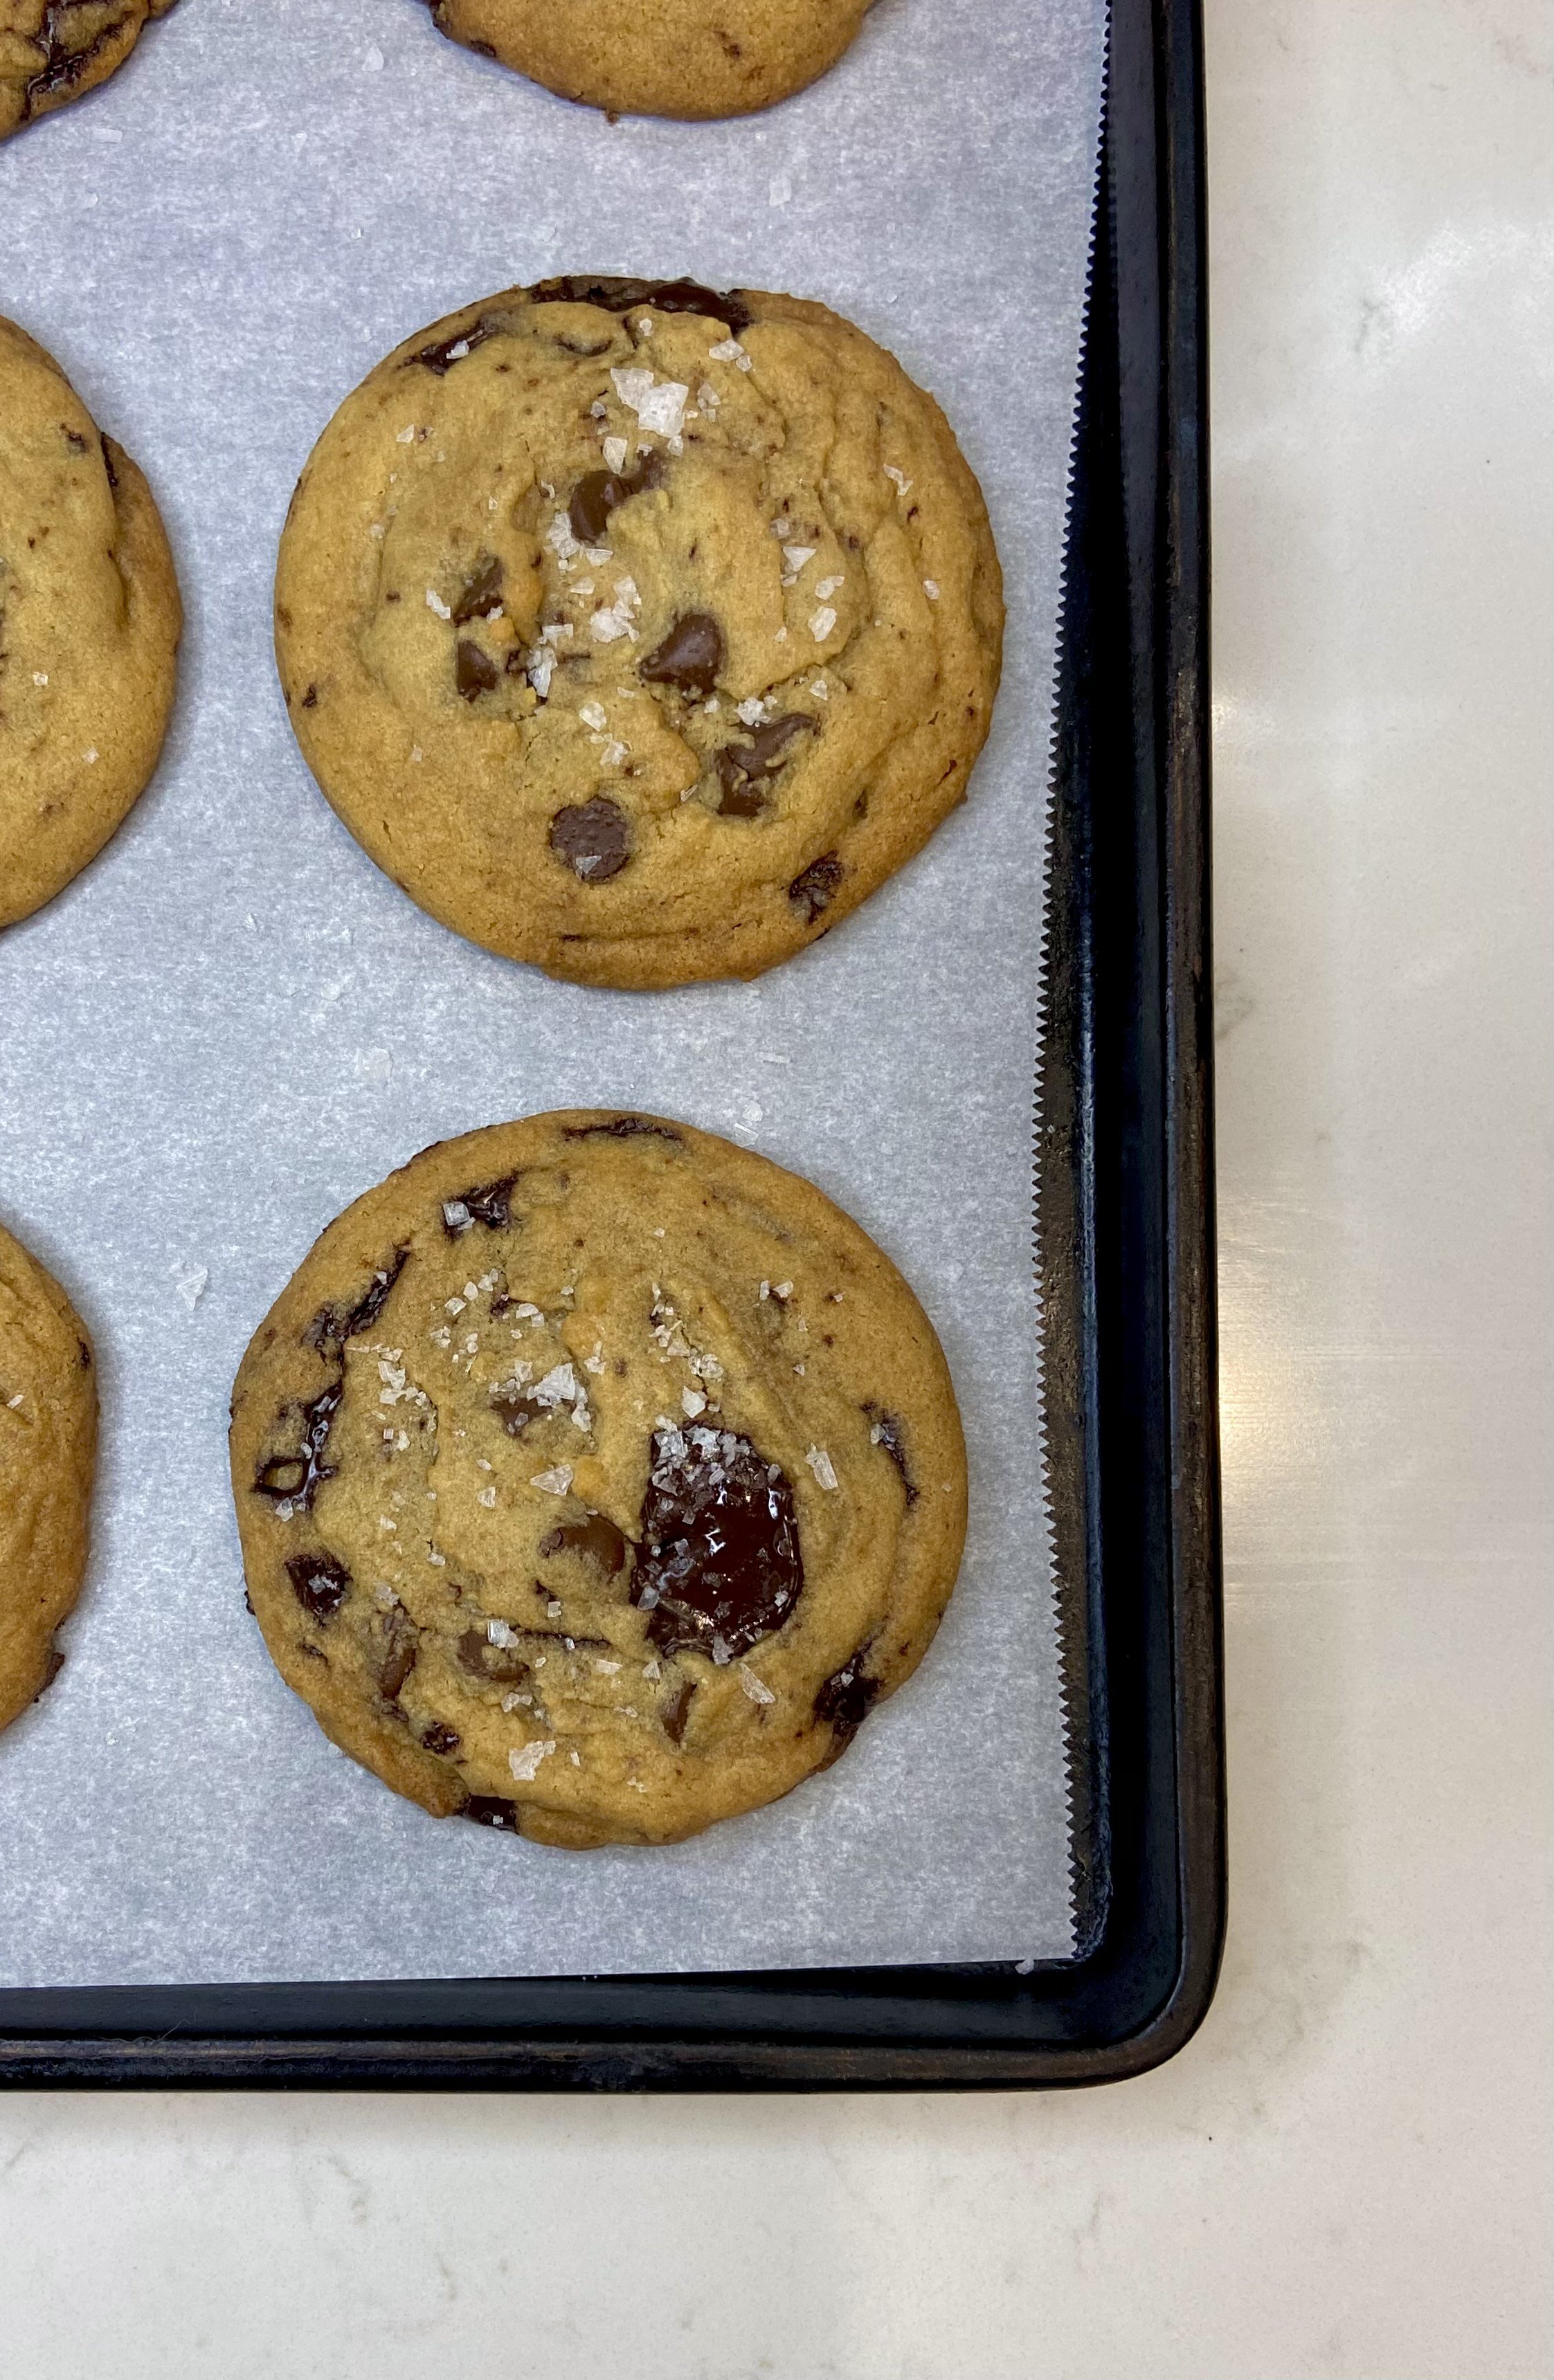
For perfectly circular cookies, use a circular bowl/cup and swirl around your fresh cookie to make edges clean. Then let cookies sit on tray for about 10 minutes before removing.
For finishing touches, add flaky sea salt and you’re done!
Step 10
You can store these in the fridge for up to 12 days or store at room temperature for 8 days!